From Simple Shed to Chicken Coop
Can a simple shed be changed into a cute chicken coop? You betcha! That’s what we did and she’s absolutely adorable!
If you’ve ever priced out chicken coops, you may have had a minor heart attack like me. Half are flimsy and not suitable for life while the other half are so expensive we’d have to remortgage our house.
Okay, maybe that’s a slight exaggeration, but the high end ones are totally out of our budget.
A Shed for Chickens
Enter the simple backyard shed. Oh yes, a boring old shed like the one below.
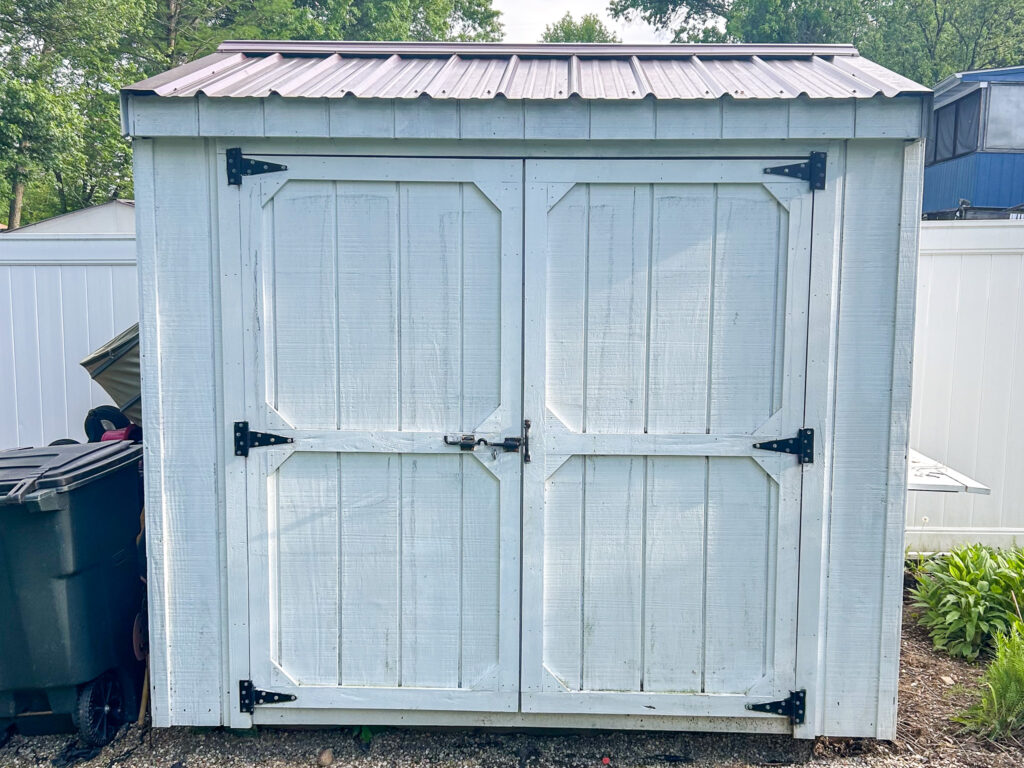
We bought this bad boy about a decade or so ago and it’s served us well. It’s a basic 6×8 wooden shed with a metal roof. It was still in great shape after years of use as it was built well from the get go.
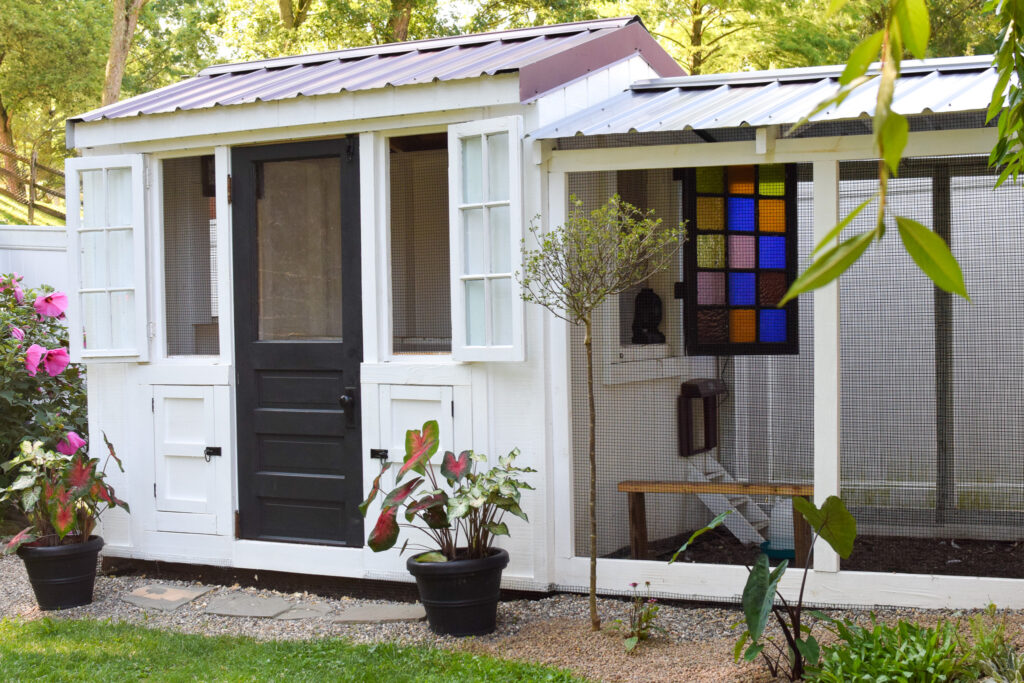
After a few (dozen) modifications we turned this simple shed into the cutest chicken coop (with an attached run) at a fraction of the high end price.
Now in full-ish transparency, I stopped counting the dollars spent after the fourth trip to Lowes. Converting this shed wasn’t as cheap as I’d hoped, but it didn’t break the bank either. Phew!
With a little DIY ingenuity and a crap ton of time (goodbye summer of ’24), we now have a beautiful chicken coop that adds to the charm of our yard.
Converting a Shed to a Chicken Coop
While this won’t be a full DIY tutorial, I’ll take you through our steps so you can get an idea of how we turned this shed into a coop for our 4 chickens.
Also, these are all cell phone pictures so they’re fairly craptastic…just a heads up.
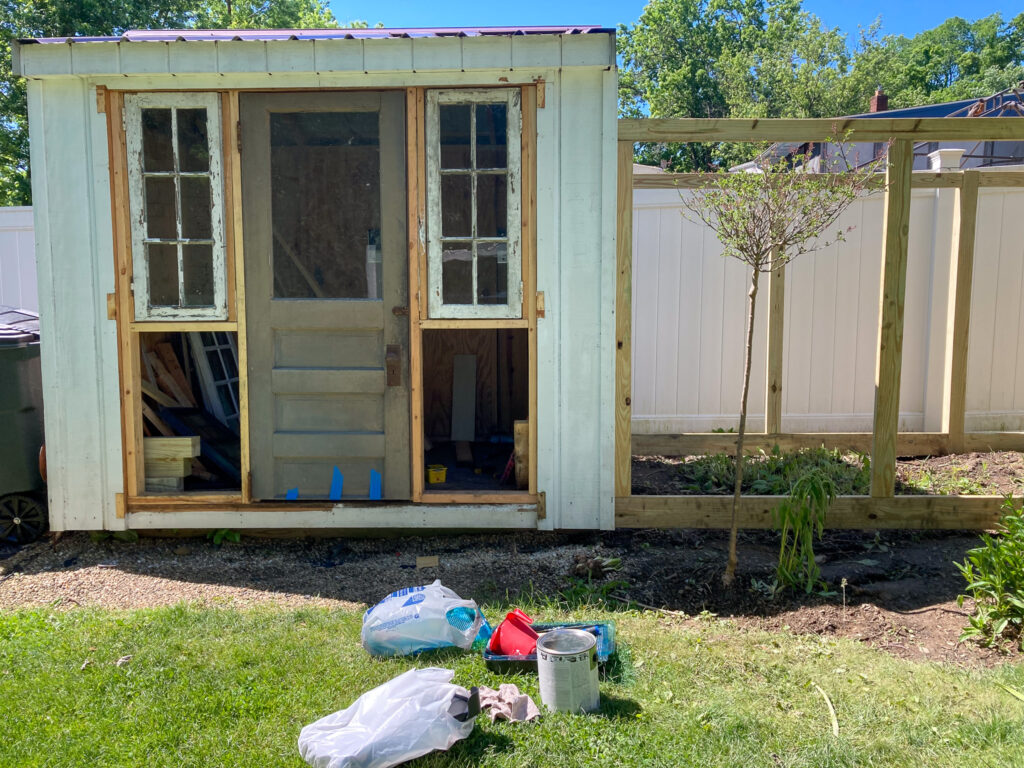
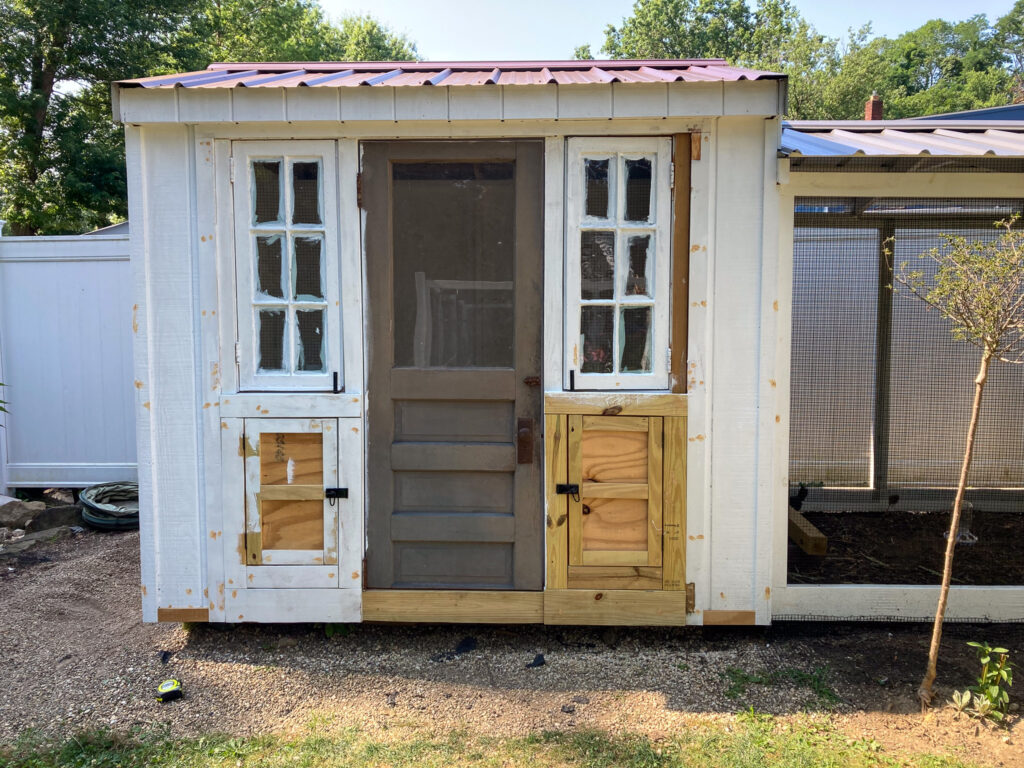
First up was tearing out the old double doors and then framing for the new windows and door.
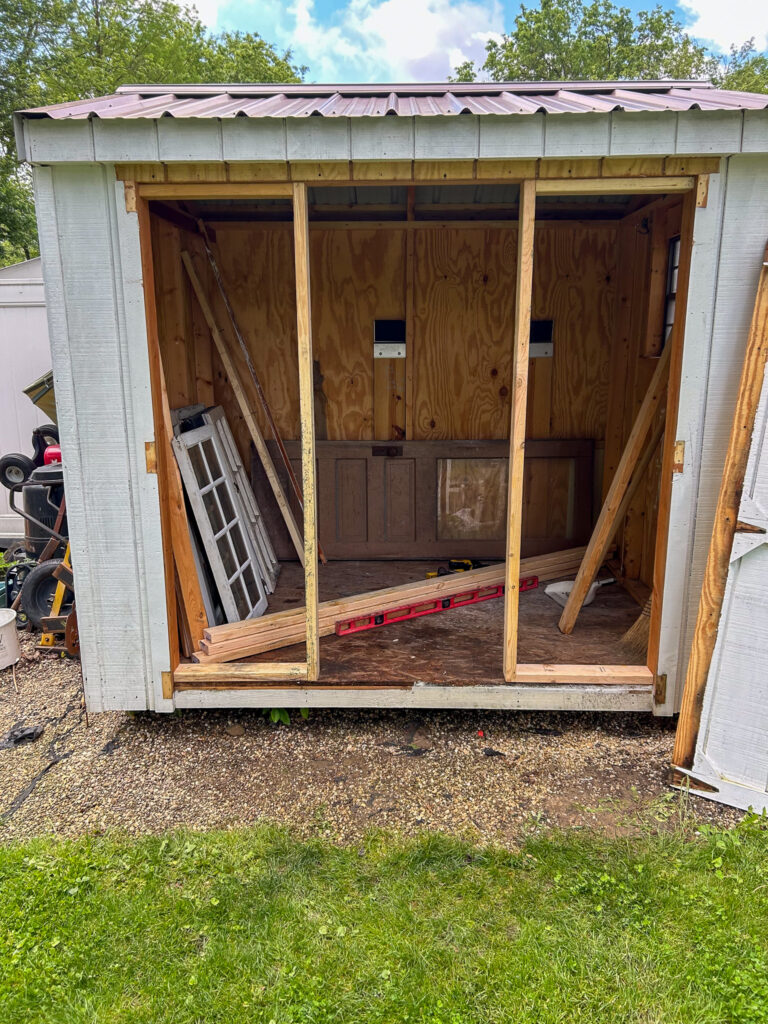
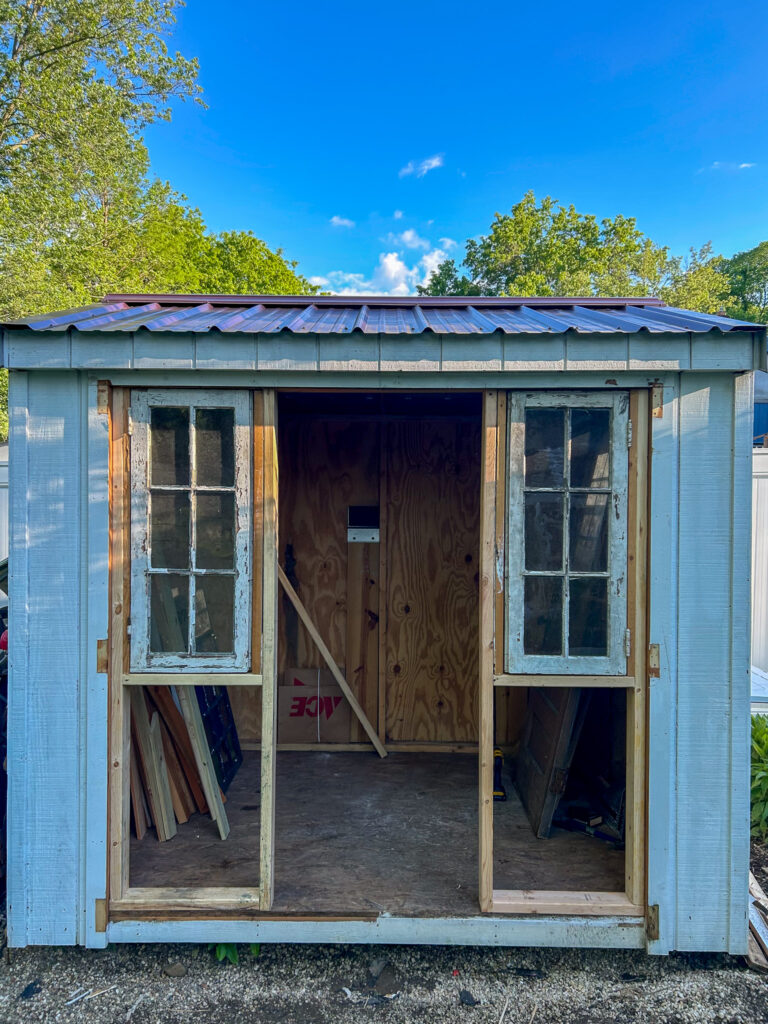
Then came the best old windows ever! We attached them with hinges so they could swing open from the outside like a door. I love the look.
In hindsight, this may not have been a great design idea. When it rains we have to run out to close the windows. And if we aren’t home when it rains we have some mighty wet chicken litter to clean up in the morning.
A better design would be to hinge the windows from the top so the window acts as its own awning. I could still change it, but I love the current look so dang much! Will form or function win out in the end? Only time will tell.
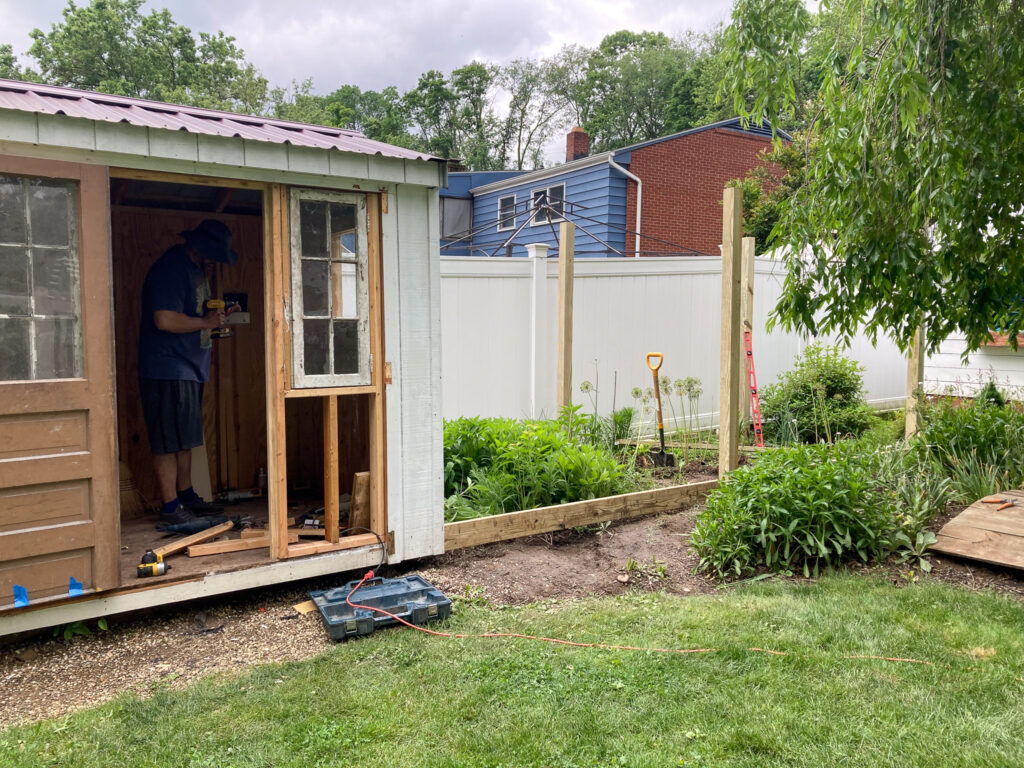
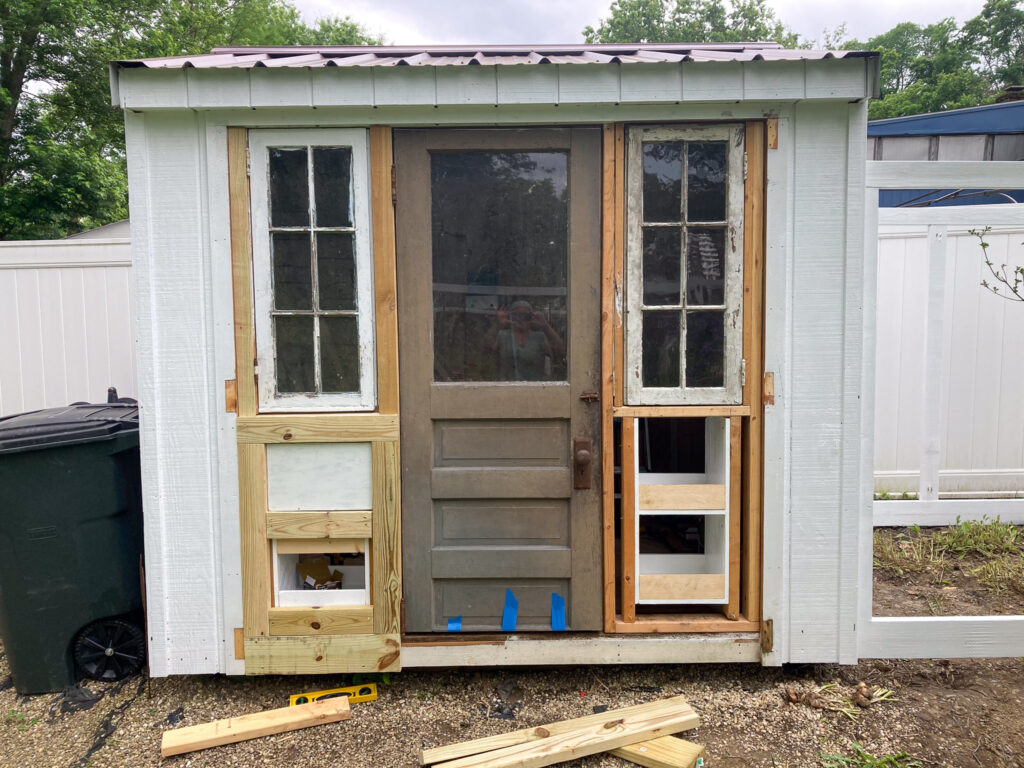
While my husband worked on adding the front door and side windows for the chicken coop, I started framing for the chicken run.
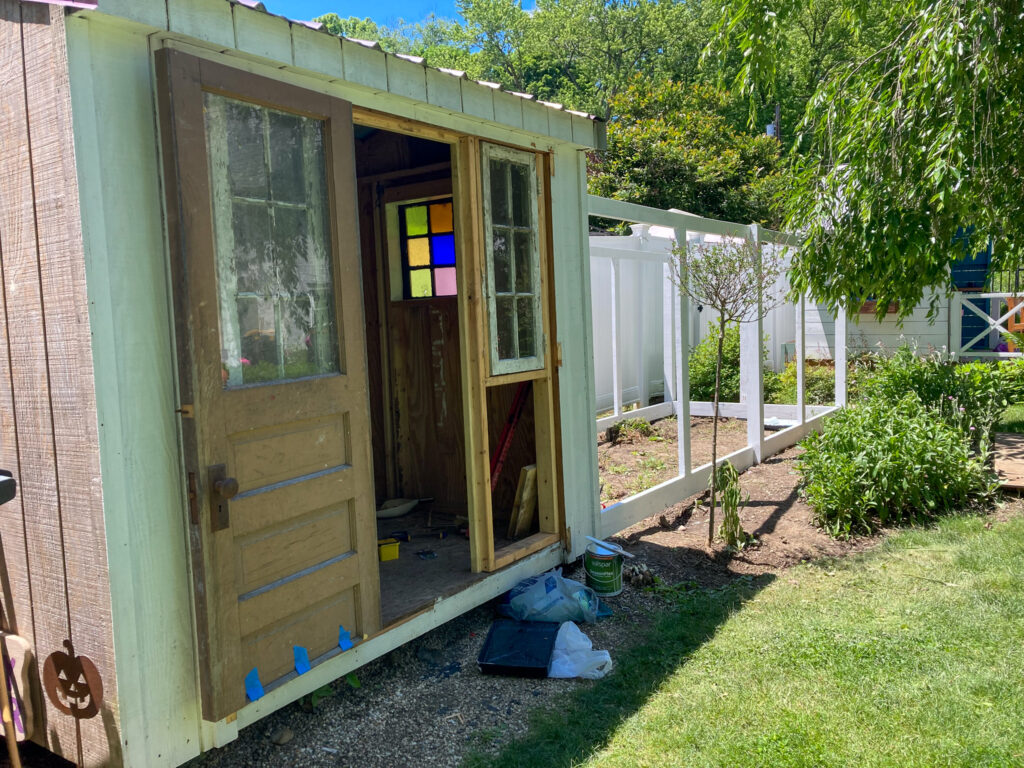
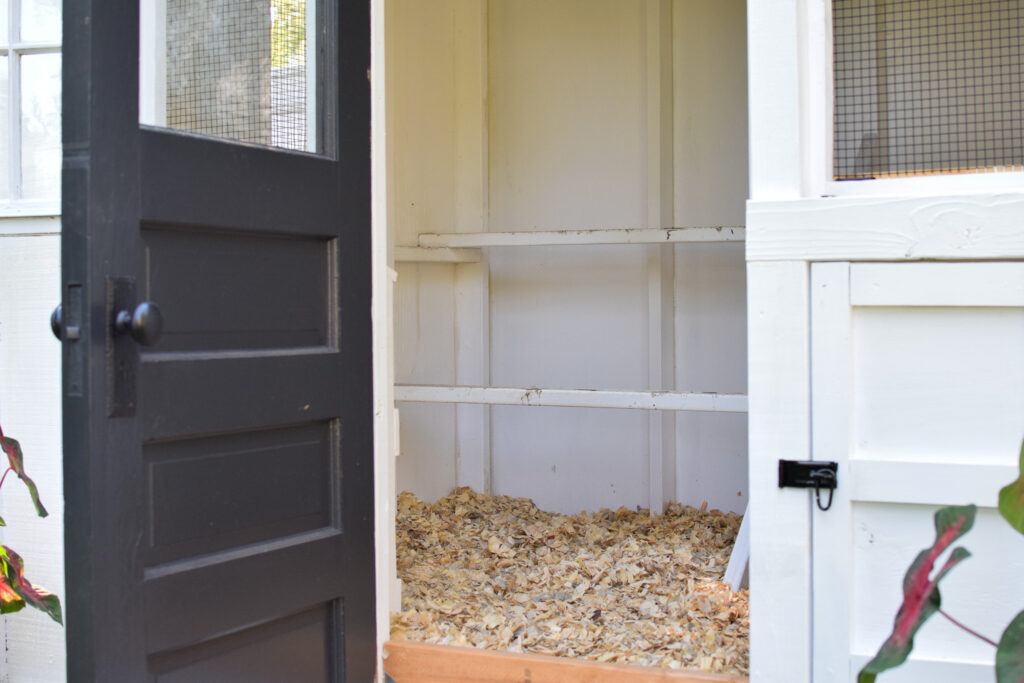
The old door didn’t look like much but she holds her own now!
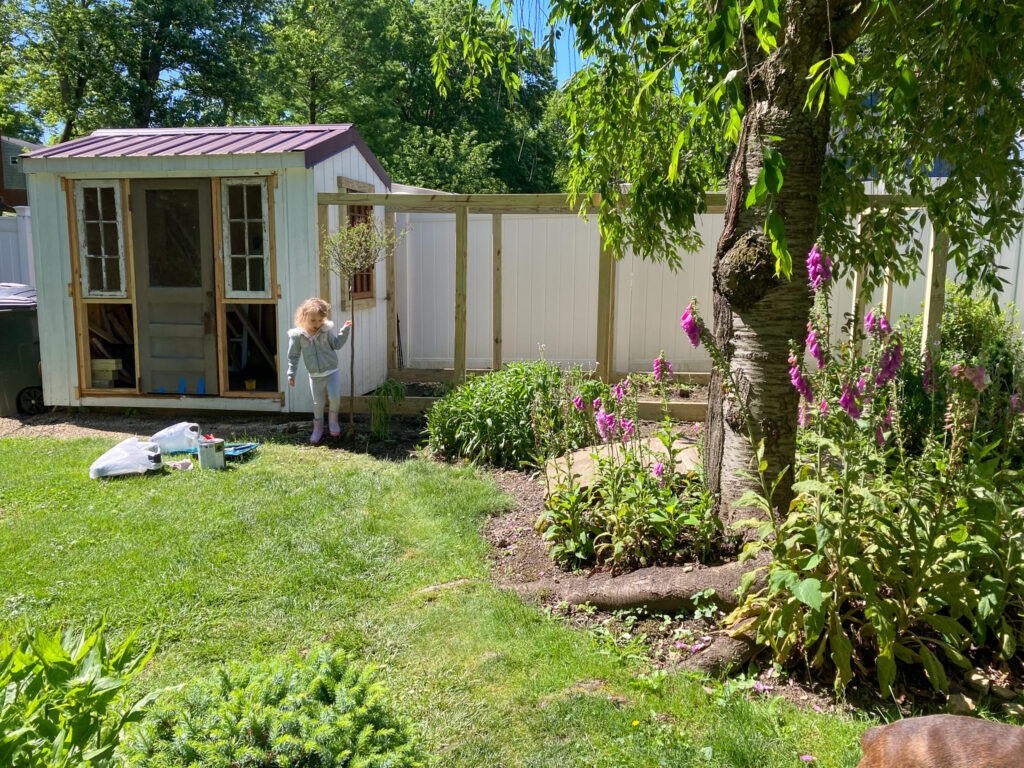
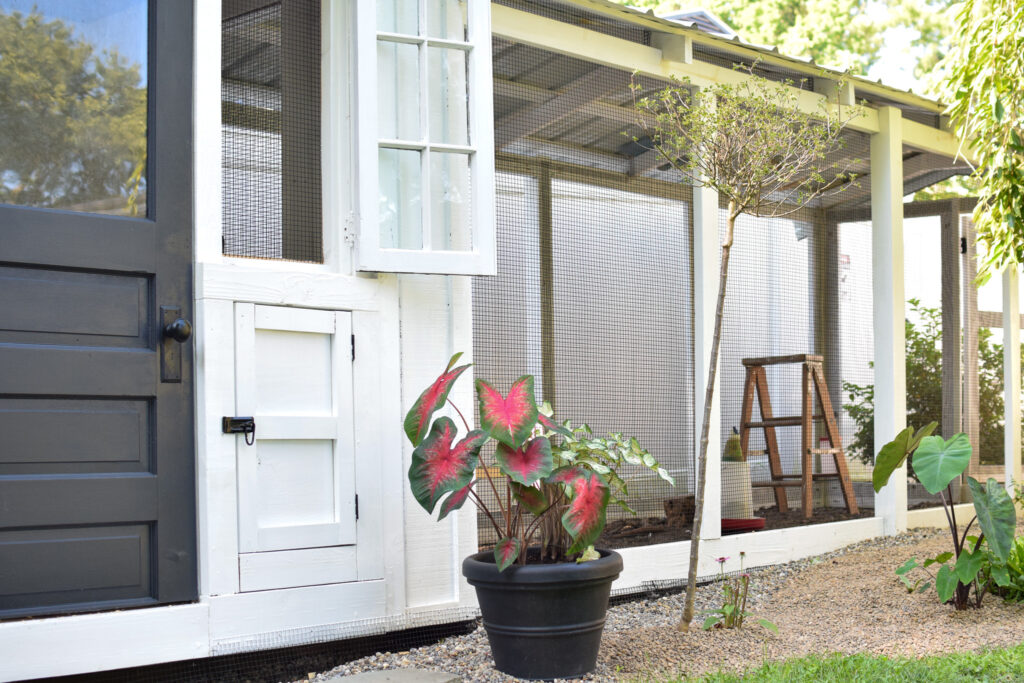
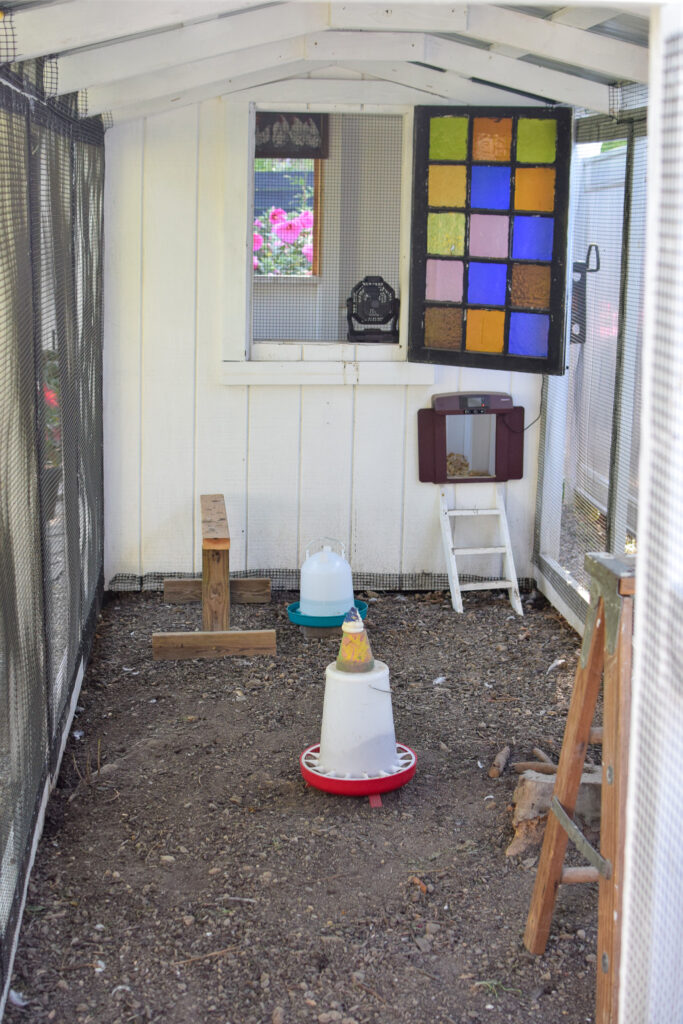
We added a stained glass window to the right side of the coop that faces the run – – because you know, chickens appreciate that stuff ;).
Now this is where I get a little crazy. I love having chickens and I especially adore cute chicken coops. However, I don’t love the look of egg boxes. I know some people love them, but I’m not team egg hutch. I’m more Let’s make a coop that looks like a tiny cottage but my chickens live inside it kind of girl.
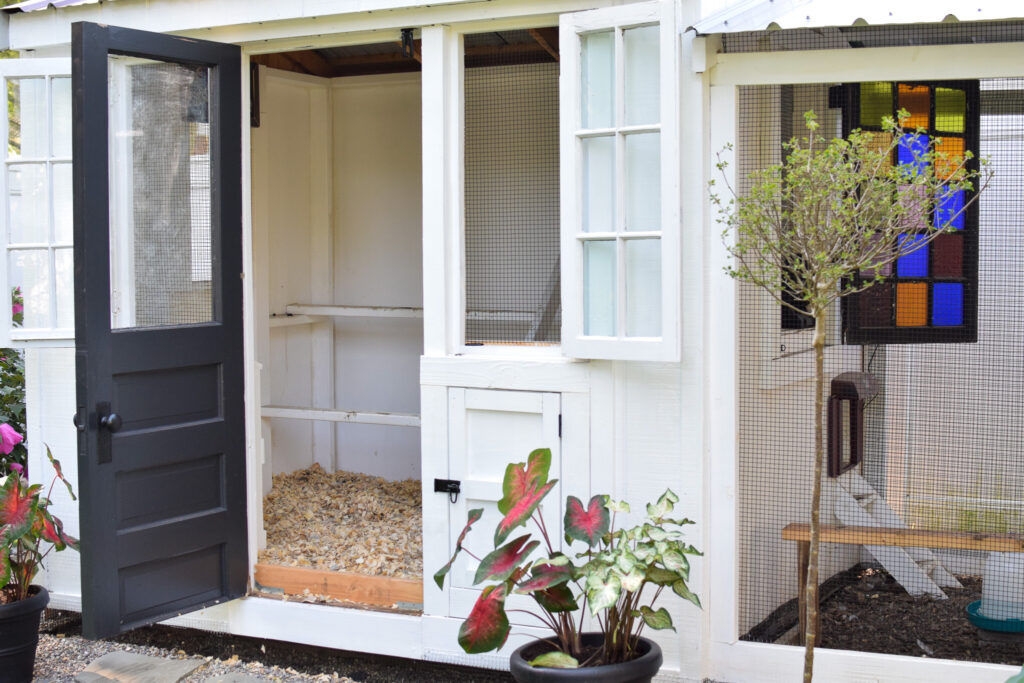
Soooo, I chose to hide the egg boxes inside the coop but gave them the most adorable little doors so we can still access the eggs from outside. The doors are made from 2×4’s and plywood. They’re hinged just like the windows above them.
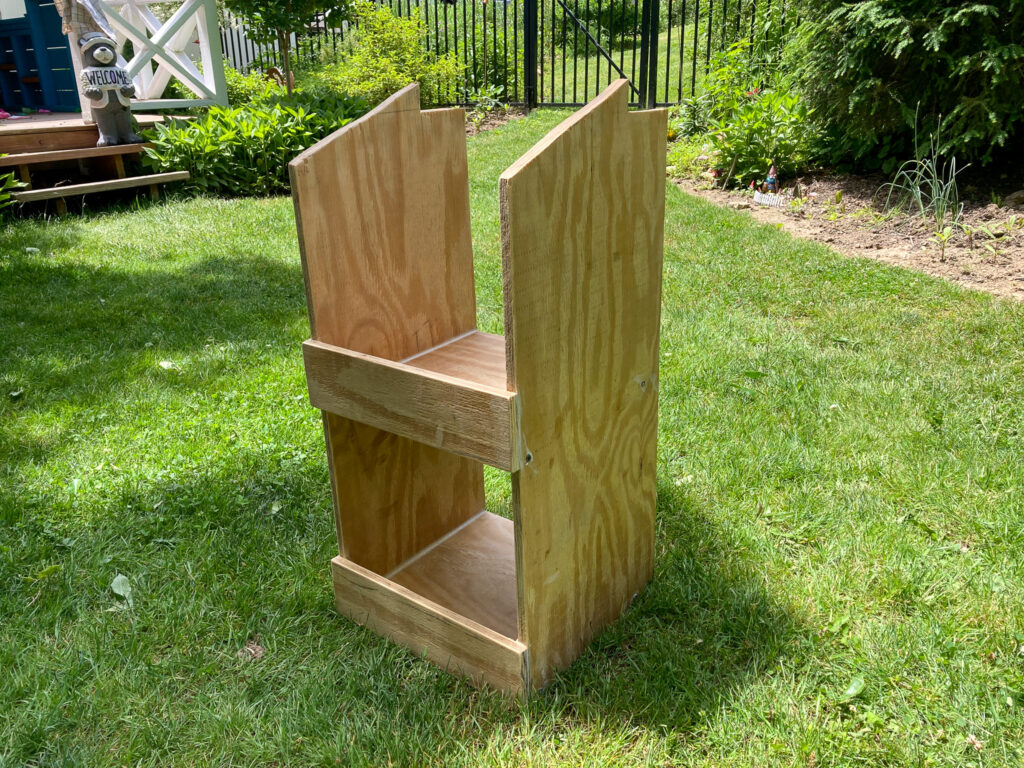
I designed the boxes to fit in the space under the windows. This requires the egg boxes to be vertical (they are usually horizontal) so they fit between the studs.
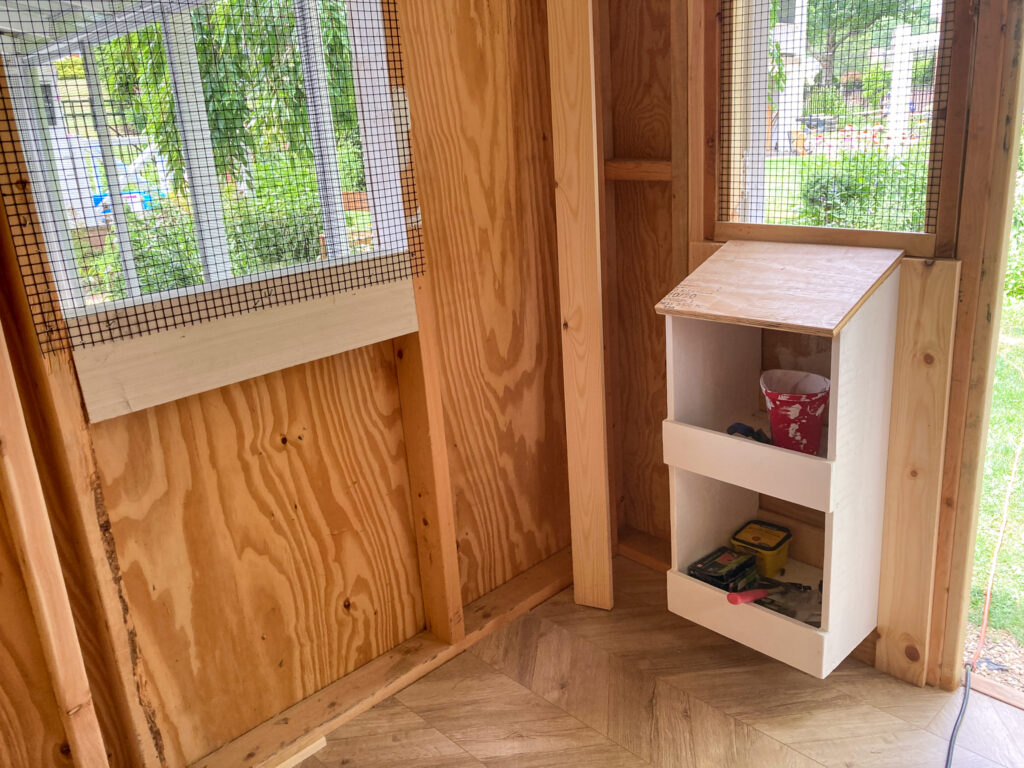
The boxes are about 11.5″ squares. I added an angled top in hopes that it would keep the chickens from pooping on it. Not steep enough. They do in fact poop on it. But for me, it’s totally worth it to not have egg hutches out front.
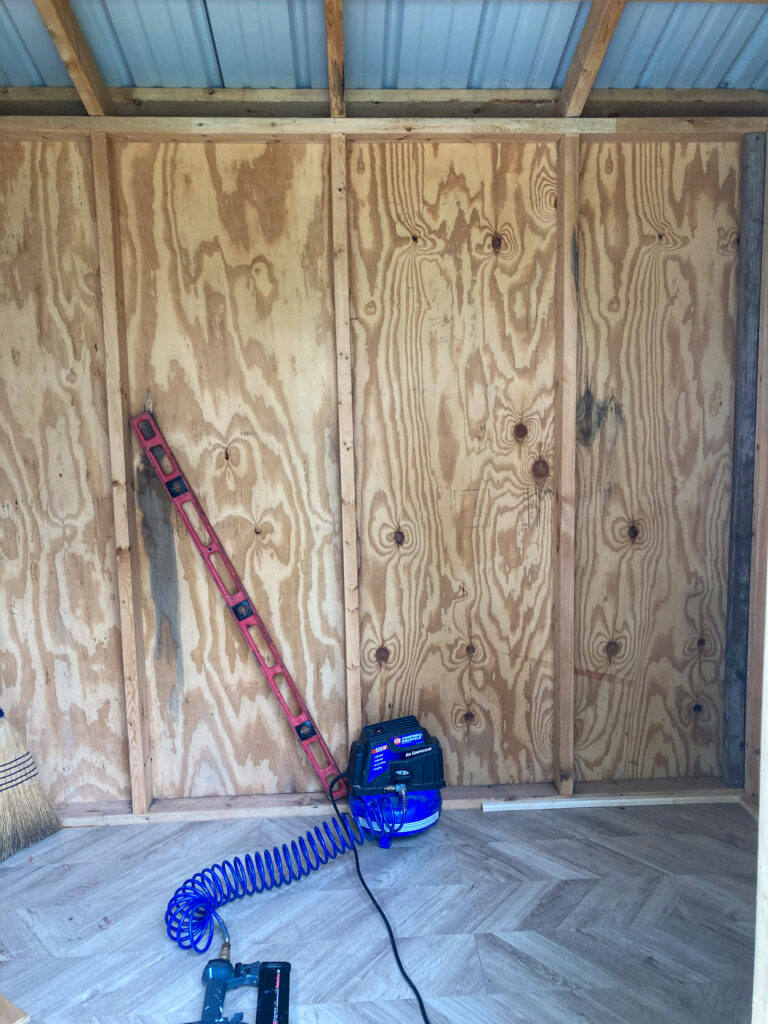
Also inside we added linoleum plank flooring. It was on clearance at Lowes – – score! This should hopefully keep most of the moisture off the wooden shed / chicken coop floor. With the entire chicken coop being wood, it’s important to watch for moisture issues and poopy wooden floors would have been an issue.
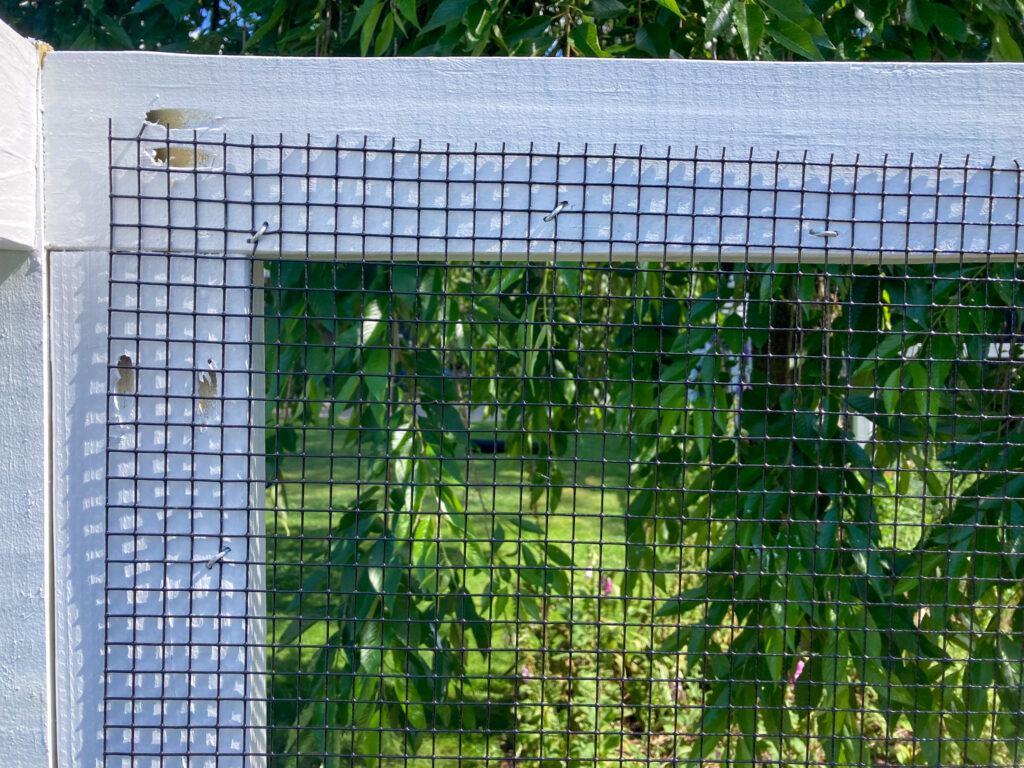
As for the run, after painting (holy crap wood absorbs paint and have you seen the cost of paint?!), I attached 1/2″ hardware cloth (purchased online here) to the run, windows, and as a perimeter around the entire coop and run area.
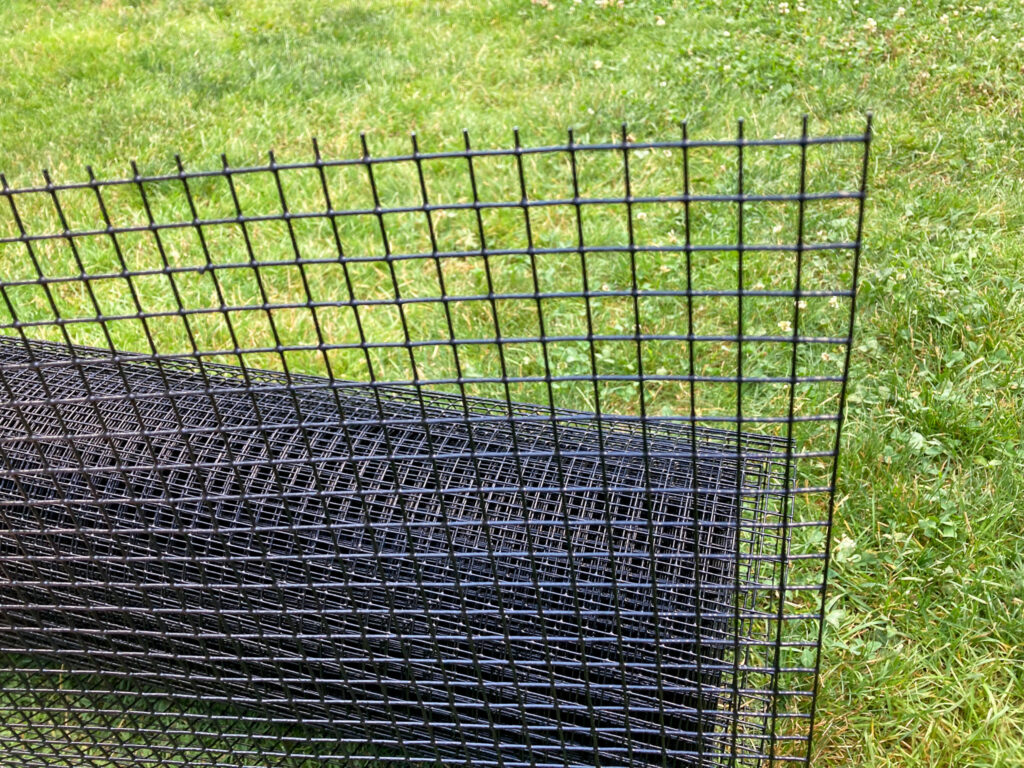
I began cutting each tiny bit by hand and it took forever. 75′ of fencing later we realized we can use a metal blade on the circular saw. That last 25′ went much faster!
We added a metal roof to the run, similar to the shed, to keep everything shaded and dry. Unfortunately the colors don’t match. If I’m ever in desperate need of extra work, I may paint the shed roof. But probably not.
From Basic Shed to Cute Chicken Coop
It’s really amazing what scrap wood and paint can do to finish off a look! White paint is like a charm magnet!
Every window and door got trimmed out in wood of some sort. I used 2×4’s, cedar fence planks, and plywood ripped to size. I had to play around with all the trim pieces to make them fit and look good.
The door received a coating of black paint and I spray painted the rusty door knob black as well. Worked like a charm!
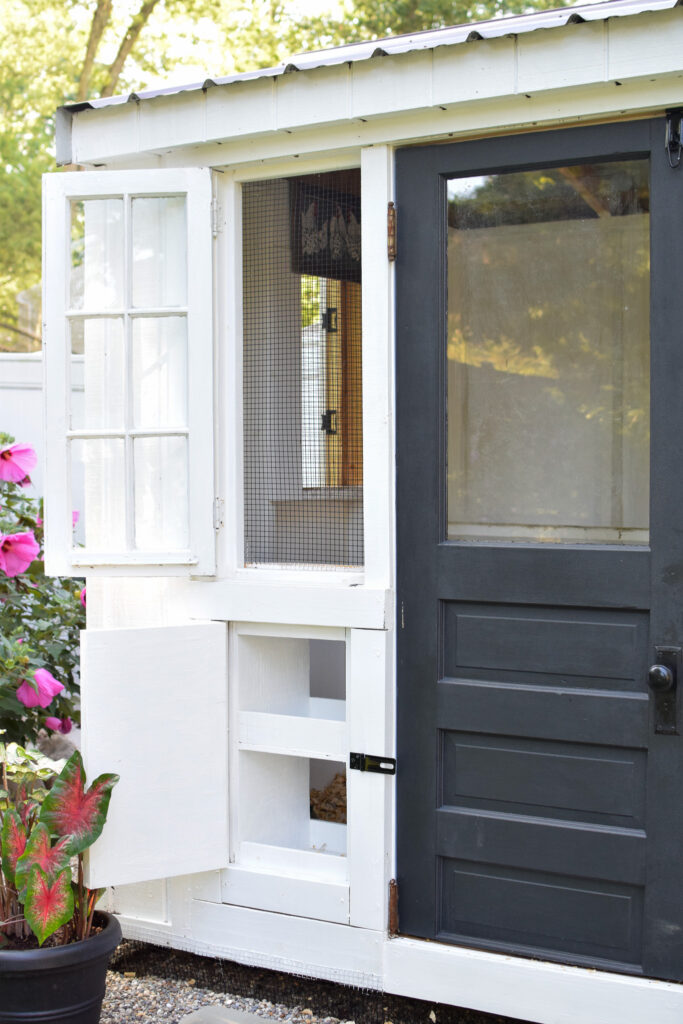
As far as predator proofing the door locks, I wanted something that would blend in. I’m still aiming for the charm factor here. I got simple black gate locks and small black hinges at Lowes and ordered black carabiner clips online.
Everything goes together beautifully. The chickens are safe, and structure is oozing charm.
For the windows, I ordered simple slide bolts online. The windows are covered in hardware cloth so they don’t need carabiners.
A simple 2×4 gets the job done for a roosting bar. I am going to change this, though. It’s absolutely filthy after only 3 weeks and needs scrubbed. However, it’s screwed into the wall in several places. So, I’m going to change this set up to a removable 2×4 at some point. But for now, it works.
Chicken Coop with an Attached Run
Our attached run is 6′ wide and 15′ long. The entire run is covered in black 1/2″ hardware cloth.
We installed a solar powered automatic chicken door (link here) which is a game changer! It’s worth its weight in gold! The doors open at 6 am and the chickens exit the coop and enter the run. The chickens head into the coop around 8:30 pm and the doors close at 9 pm.
It took them only 1 day to figure out the system! The first day it was installed we went in the run around dusk. All 4 chickens were perched on the window sill in the run. We took them one by one and gently pushed them (they were not happy) through their little door.
That was all it took! The next day the chickens entered themselves before the door shut. I feel like a crazy lady but I am so proud of them!
We also added a human door to access the run on the far side. By human, I mean small human. I have to duck ever so slightly to get in or out and I’m not tall. But, once inside I can walk around.

A Backyard Chicken Coop Shed
All in all this shed to chicken coop conversion took 2 of us about 2 months to complete. I crazily thought we could get it done in a couple weeks. Jokes on me!
The chickens were nearing 6 weeks old and we HAD to finish. Everyone says “Finish the coop before you get chicks”. Well, I thought 2 weeks was enough. It was not!
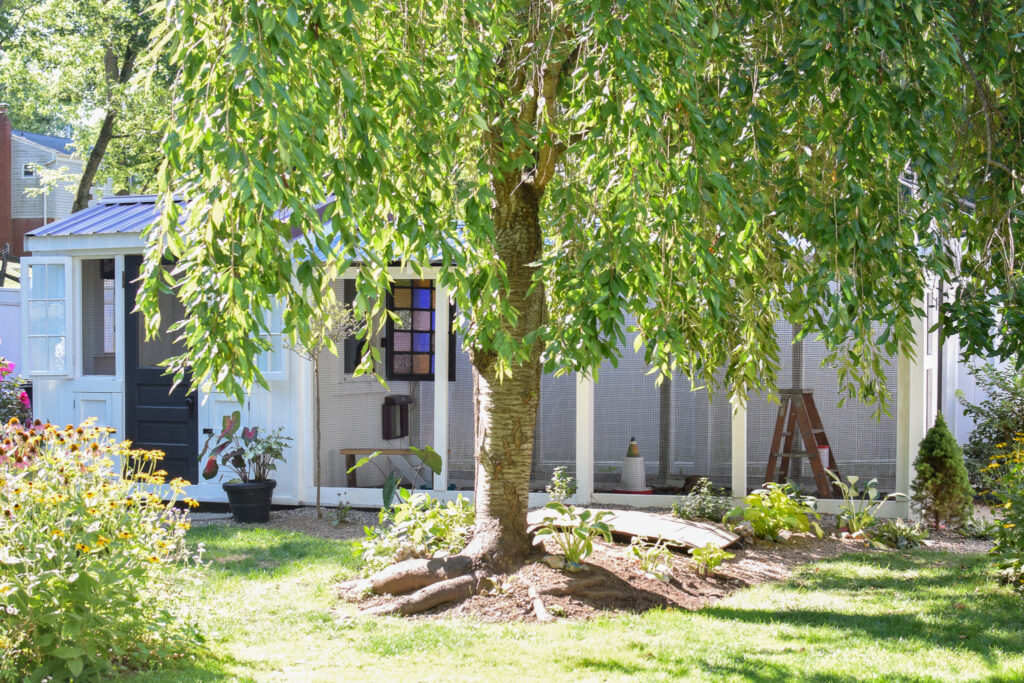
I’m incredibly happy with how our old shed received a new life as a chicken coop. It’s absolutely adorable and blends in with our yard.
But more importantly (equally important maybe?) our chickens have a safe and clean place to spend their lives.
If you’re still looking into getting chicks, you may want to check out my post on Friendly Chicken Breeds.
I hope this helps give you an idea or two of what you can do with your backyard shed. If you have any questions, I’m happy to help!