
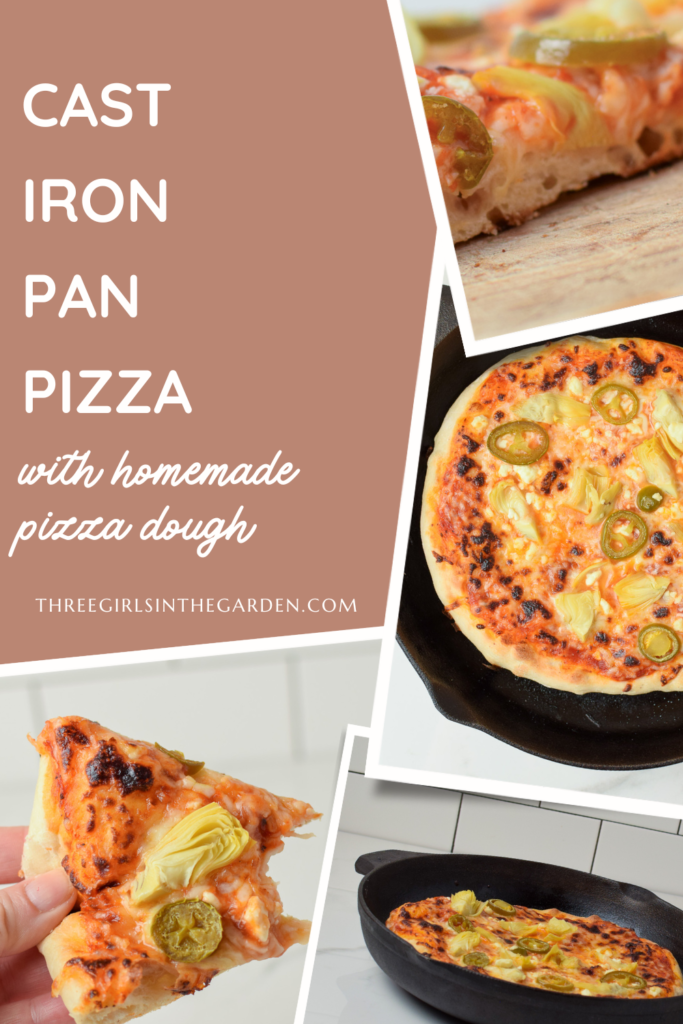
How to Make Cast Iron Pan Pizza
I’ve been making homemade pizza for quite some time now so I didn’t really think it could get better. But then one lucky day my cast iron pan was left on the stove (yay for laziness) and I thought, “Can I make pizza in my cast iron pan?”. Why yes! Yes I can! And friend, you can too!
I’m sure cast iron pan pizza would be damn tasty with any dough, whether frozen or a pop can (if that’s how you roll). That’s how I got started! But I will tell you, when you can prep cast iron pan pizza dough 5 minutes before you head out the door for school pick up and have the dough ready to throw into a cast iron pan when you return, is frozen really easier? Nope, I think not.
So, while you can certainly use whatever dough you like, I strongly encourage you to make your own dough. It’s amazing. It’s life changing. Okay, maybe not life changing, but it’s dinner changing, for sure. We haven’t ordered pizza in over 2 years since making it homemade. Seriously, nothing can beat this.
How to Use a Cast Iron Pan for Pizza
This is super simple. When your dough has doubled in size (recipe is below) after about an hour, it’s time start heating things up!
Move your oven rack into the 3rd slot from the top. It should be fairly high. Set your oven to high broil.
Place your cast iron pan on your stovetop and turn to medium heat. I don’t ever go over medium – – cast iron is crazy awesome at conducting heat quickly, and I usually have 2 hangry kids running around distracting me. Any higher in heat and I’ll likely burn the crust. And I’ve NEVER burned the pizza bottom using a cast iron pan!
Prepping the Pizza Dough
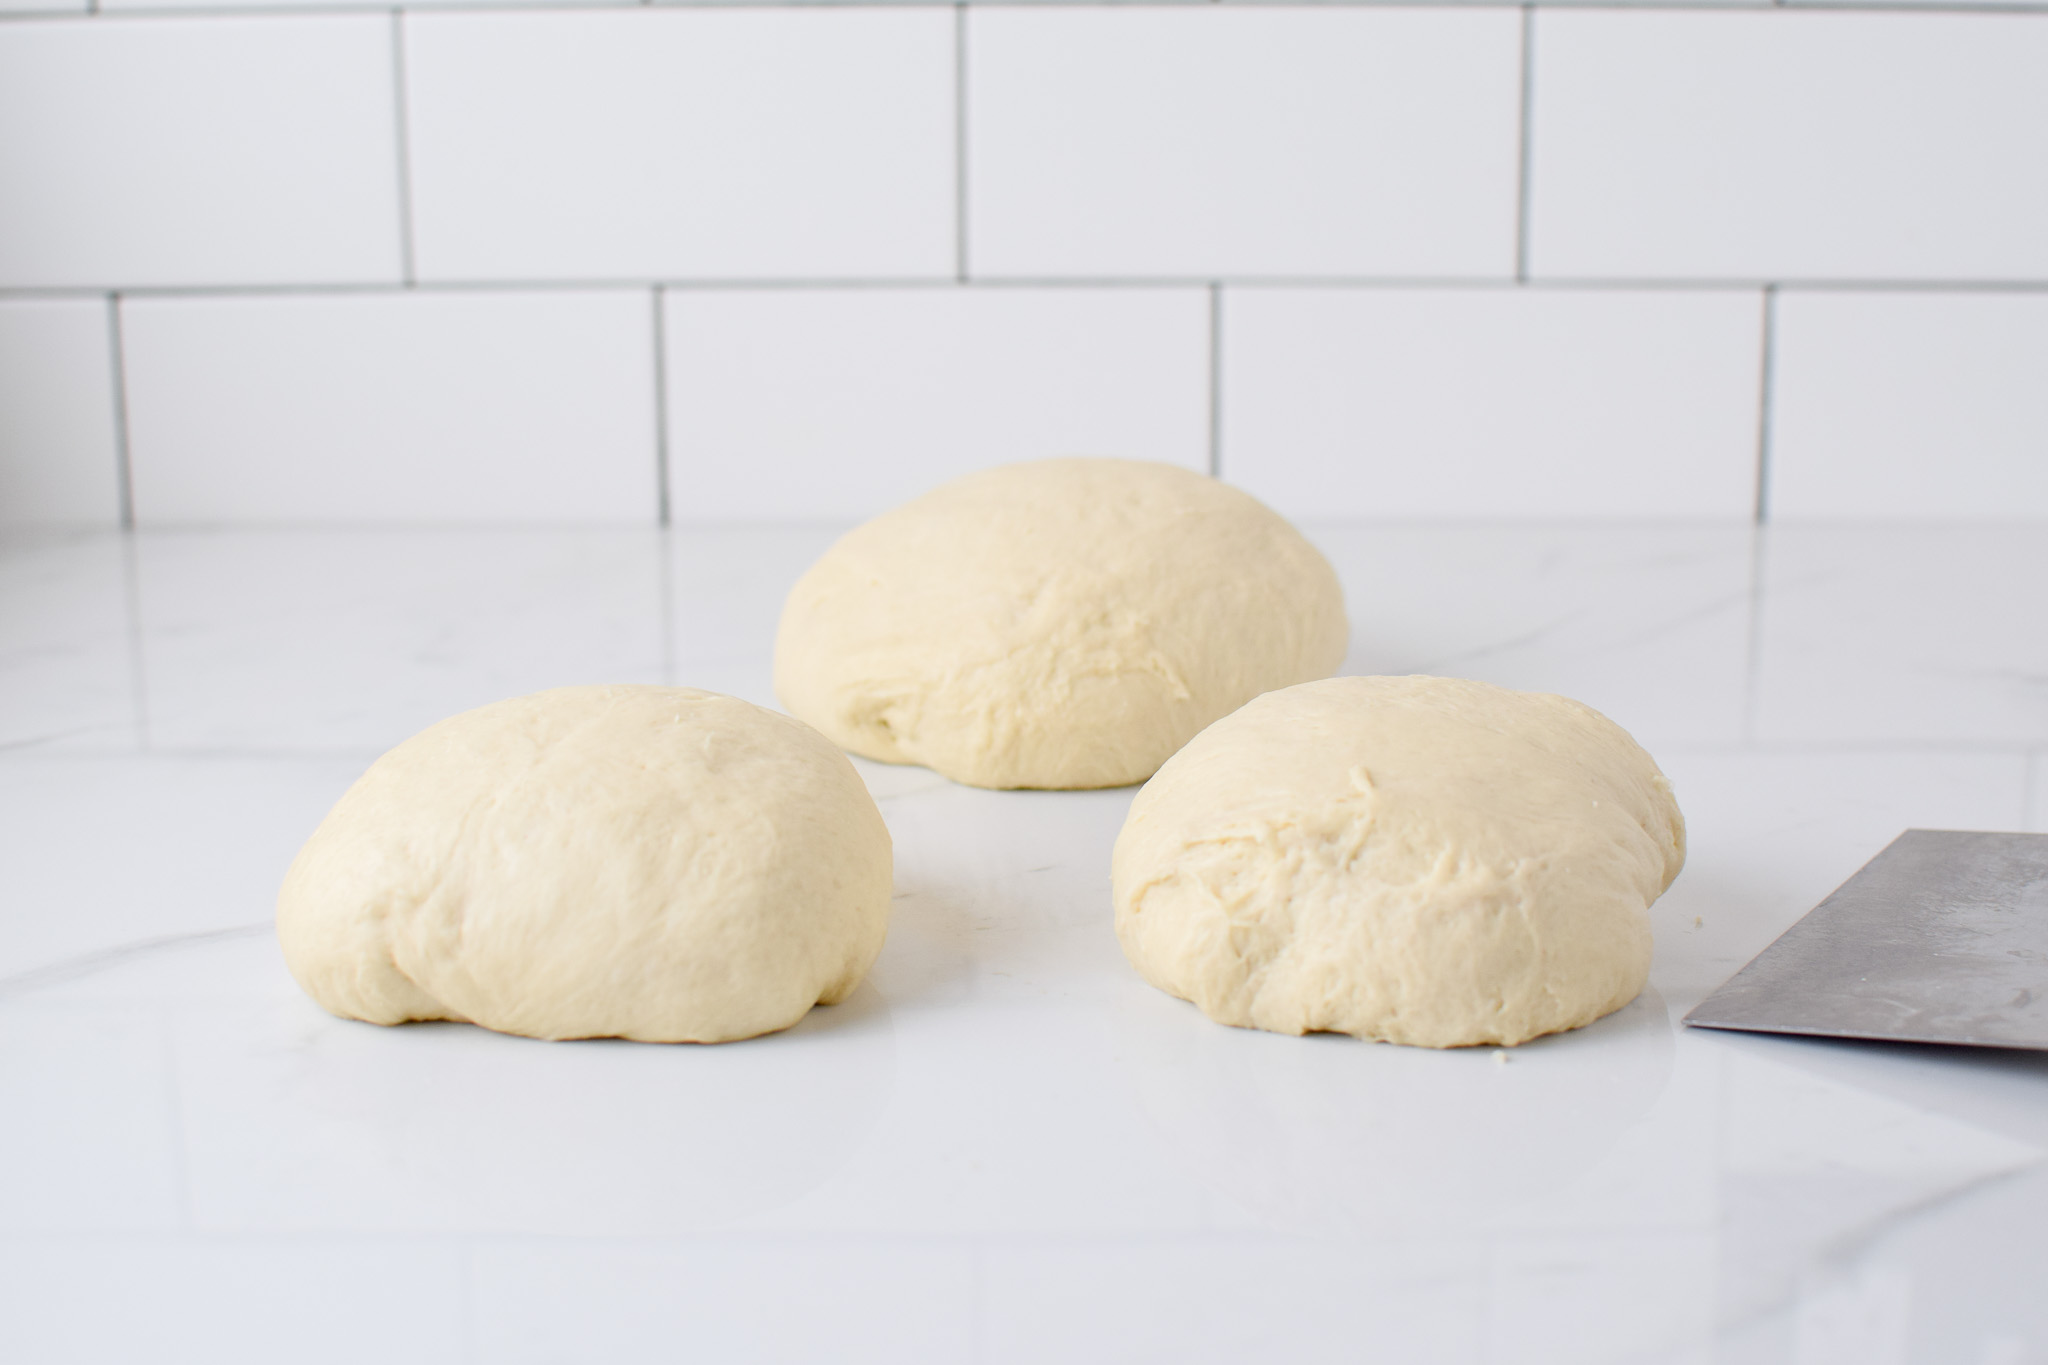
While the pan is heating, take 1/3 of your dough (my recipe makes three 10″ pizzas) and start pressing it out onto your counter. You can lightly flour the counter if the dough is feeling a bit sticky. Sometimes I use a rolling pin, other times I’ll just use my hands. Sometimes I’l stretch it over my knuckles, sometimes not. The point is, stretch it out into a round shape about the size of your cast iron pan. Mine is 10″, so I aim for that. The dough is forgiving and you can’t really go wrong. Please don’t measure. Just eye ball it. Keep this simple!


When the pizza dough is in the right shape and your desired thickness, drizzle extra virgin olive oil (or whatever kind of oil you like – – coconut oil will be too strong a flavor here) into the pan and spread it out with a spatula. You just want the pan covered. You shouldn’t see puddling oil. This is just a thin coating. You’ll see a sheen, and nothing more.
Carefully place the dough into the hot pan and very carefully stretch the dough back out into the edges of the pan.


Topping the Dough
Place a drizzle of olive oil over the dough and spread it out. I like to sprinkle garlic salt around the crust (less for the kids) and a little over the middle. Scoop your sauce onto the dough and spread it out. I like light sauce. 1 or 2 scoops is more than enough! You should be able to still see the dough through the sauce! I was little heavy handed today and usually use less.
Side note, my sister couldn’t figure out why her pizzas never turned out like mine. After we did some troubleshooting I realized she was using an entire jar of sauce! I make about 6 or 8 pizzas from 1 jar of sauce.
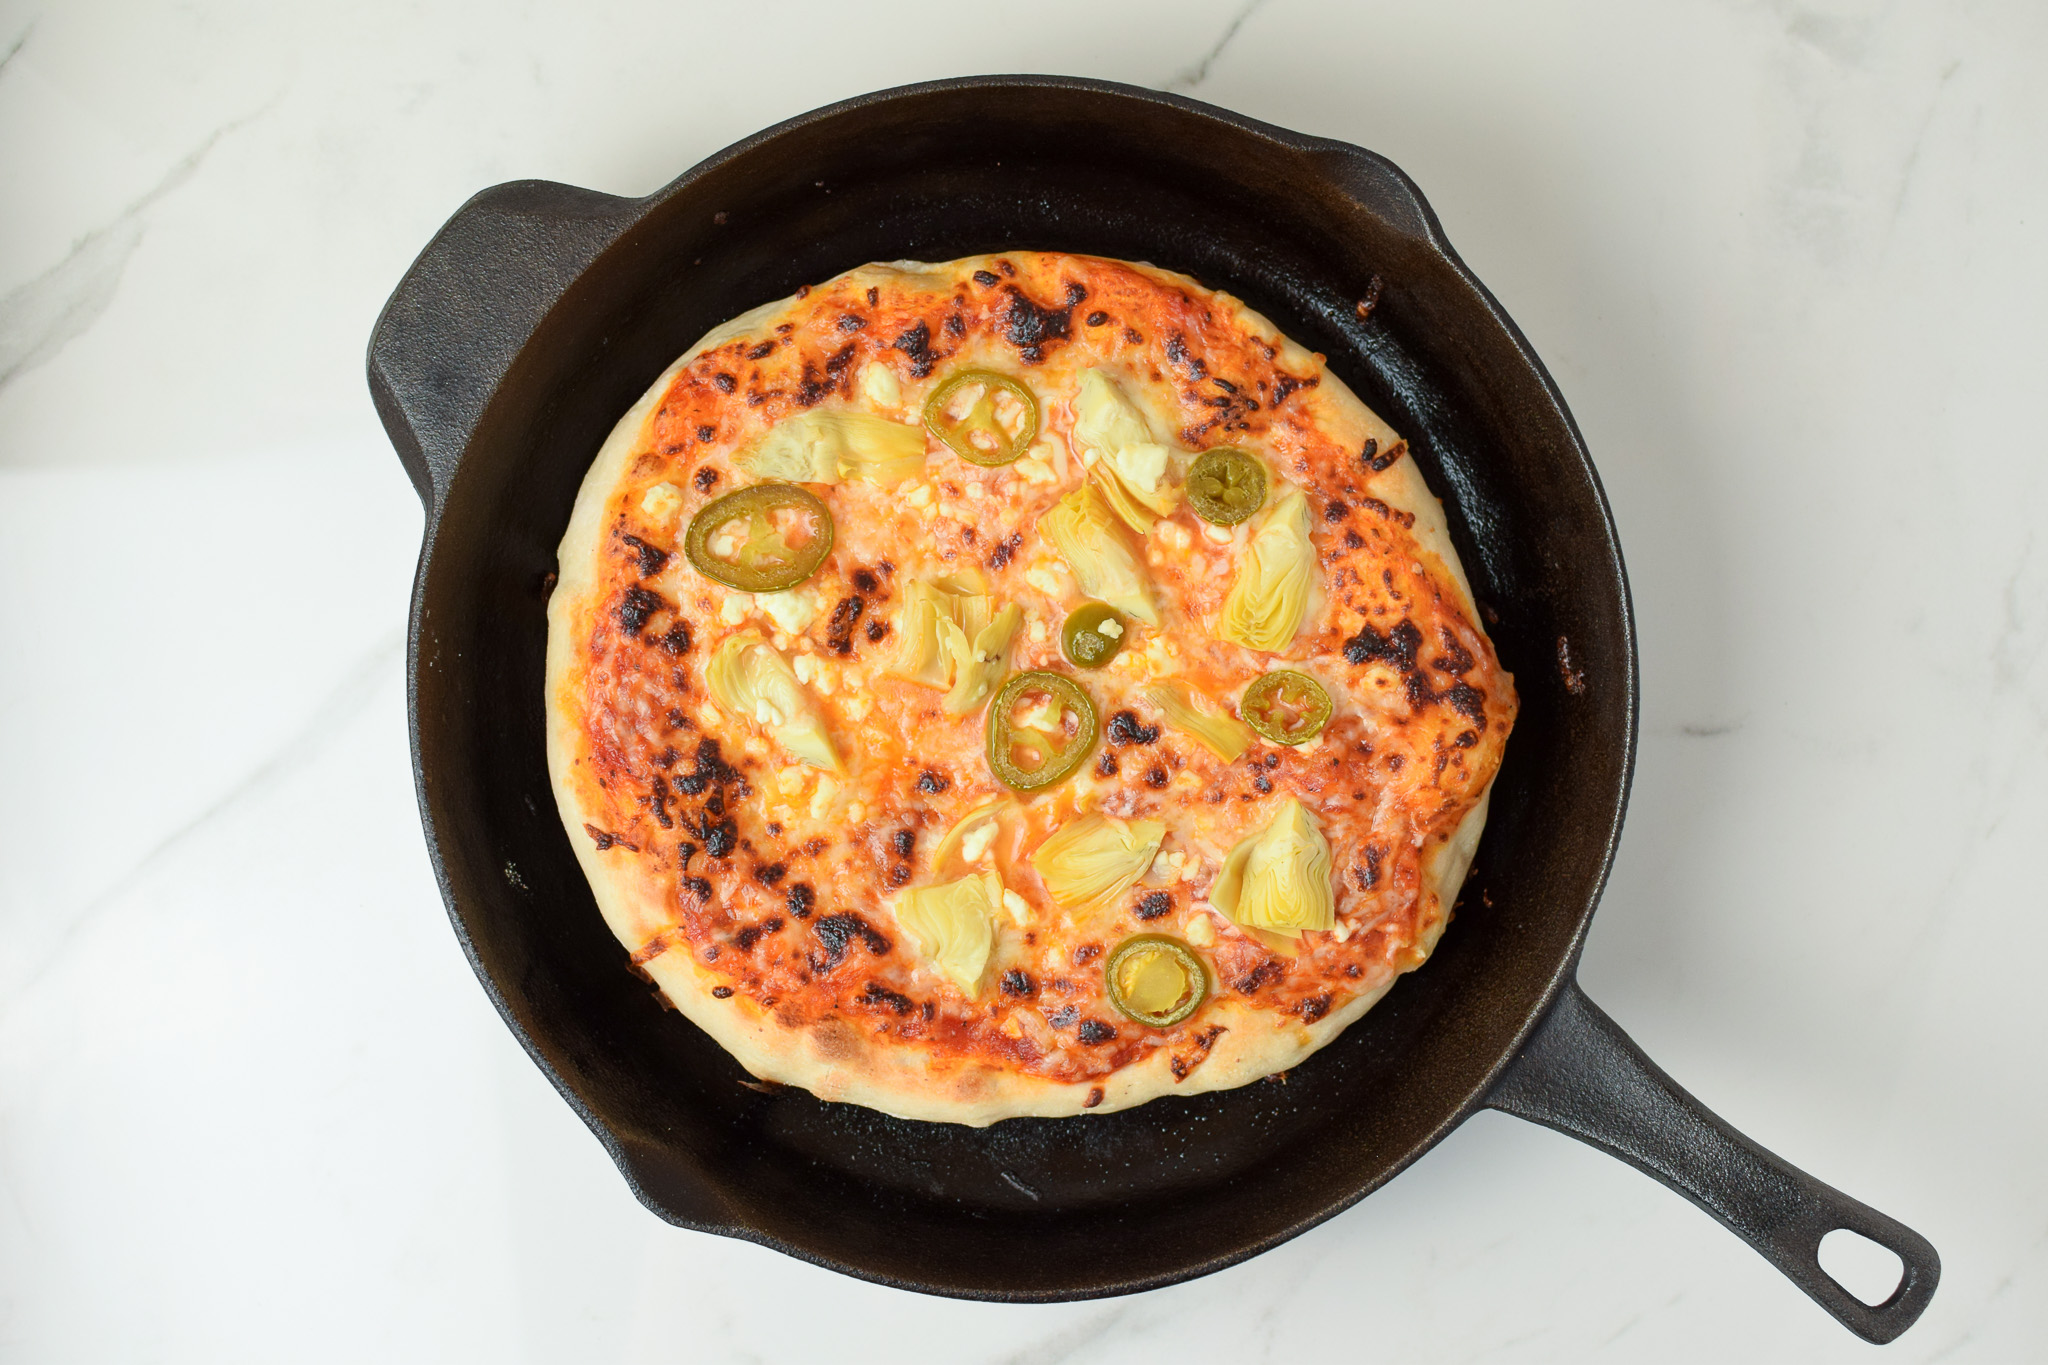
Sprinkle with your favorite cheese (I’m a standard mozzarella girl) and your favorite toppings. We usually make one cast iron pan pizza with pepperoni, another with pepperoni, feta, and jalapeños, and the last one with feta, pickled onions and artichokes. Don’t knock these combos until you’ve tried them!
By the time I’ve finished making the pizza in the hot pan, the bottom has cooked and is lightly browned, and the top is raw and ready for its broil!


Broil
Turn off the stove top and very carefully use a thick oven mitt (or if you’re crazy like me just use a tea towel folded over a few times) and place the cast iron pan with the pizza into the oven. High broil is quick! Don’t walk away!
My first pizza is usually done in 3 minutes, and the second and third pizzas are done in about 2 minutes. Start with 2 minutes and keep an eye on it. An extra 15 seconds can crisp up a cast iron pan pizza pretty quick. Set a timer if you must. We had a child meltdown during one cooking and 5 minutes later we had a VERY crispy pizza. Still ate it, don’t get me wrong.


I like to see a bit of black on my toppings. I think it gives the absolute best flavor ever! And as an added bonus, if you have any dairy-free eaters (my oldest), broiling the pizza actually makes the vegan cheese melt! It looks like a real pizza. Not like weird plastic. Vegans, you know what I’m talking about.
When your pizza is nicely broiled, carefully tip the cast iron pan and let the pizza slide out onto a cutting board. You may have to nudge it along with a spatula if it’s not cooperating.
Repeat
Now it’s time for the next 2 batches of dough. Make sure to turn your stove top back on (yes, I have forgotten), and place the cast iron pan back on the flame. Now you just repeat. I still like to add a bit of oil for these subsequent pies. You can make these pizzas taste like Pizza Hut if you go heavy handed with the oil (I did it once, and I will say they were delicious). But I prefer a bit less grease coming off my pizza. Your call! Try it both ways and see what you prefer.


Tips for Making Homemade Pizza Dough in a Cast Iron Pan
If you’ve never made homemade pizza dough, you’ll be amazed at how easy it is. If yeast or warm water makes you turn away, I urge you to reconsider! Yeast will basically work in any temperature water, it may just take a bit longer.
- The ingredients are broken down into grams so you can be exact in your flour and water quantities. If you don’t have a scale, A) get one, B) just use the measurements for now until you get a scale (seriously, get a scale. They’re awesome!).
- When I say “warm water” just think of newborn bath water. If you’ve never bathed a newborn (or it’s been a while), then just use water that you don’t want to pull your hand away from because it’s uncomfortable/hot/cold. Room temp will work, it’ll just take longer. Aim for a touch warm.
- You can use a yeast packet which contains 2 1/4 tsp of yeast. Or you can use 2 tsp of yeast if it’s in a jar. Again, the exact amount doesn’t really matter. Do what’s easier. I personally hate measuring 1/4 tsp from my Costco sized jar of yeast.
- All-purpose flour is all you need. I get King Arthur flour from Costco (way cheaper for a 25# bag). It has never let me down. I have had some tragic results with generic flour. You’ve been warned.
- When the pizza is done and it’s time to clean out your cast iron pan, wait until it’s cooled off. You’re not supposed to use anything abrasive, but I use whatever dish soap is sitting on my counter. The important part is drying the pan thoroughly. After drying, I let it sit on my stove for a while. That way if I missed any water it’ll evaporate and won’t rust.
Let’s Get Baking
Are you ready? Have any questions? You can do this!
If you love to cook or bake, you can find more recipes here. If you love using fresh from the garden produce, check out more on gardening here.
As always, you can find us on Instagram or ask questions in the comments. If you try our pizza dough in a cast iron pan, I’d love to know what you think!
I hope we talk soon!
Cast Iron Pan Pizza
Equipment
- Cast Iron Pan
Ingredients
- 332 grams warm water 1 1/2 cups
- 6 grams active dry yeast 2 1/4 tsp
- 8 grams honey or 1 tsp sugar
- 600 grams all purpose flour 3 1/2 cups
- 10 grams salt 1 1/2 tsp
- 22 grams olive oil 2 Tbsp
Instructions
- In the bowl of an electric mixer (you can also mix by hand) add water, yeast, and honey and stir.
- Add in flour and then salt. Knead by hand, or turn your mixer on low (with a dough hook) for about 30 seconds, until a shaggy dough forms.
- Add oil and knead with dough hook for 5 minutes on speed 3 or 4. After kneading, drizzle a bit of oil in the bowl to keep the dough from sticking and place the dough back in (makes clean up easier).
- Cover the bowl with plastic or a damp towel until the pizza dough doubles..roughly 1 hour.
- Once the dough has doubled, divide into 3 equal portions and cover the portions you aren't using.
- Flatten the dough out by hand, or use a rolling pin if you prefer, until it reaches your desired thickness. 1/4" to 1/2" is ideal.
- Heat up a cast iron pan over medium heat. Add in a bit of oil to coat the bottom.
- Move your oven rack to the 2nd or 3rd highest position and turn your oven to high broil.
- Place the dough in the hot and oiled pan. Add your sauce, cheese, and toppings. When you've finished adding toppings, check the bottom of the crust. It should be lightly golden brown…it takes about 3 minutes.
- Carefully take the cast iron pan off the stove top and place it in the oven (turn off the burner). Broil the pizza for 2-3 minutes. Broiling can go quickly, so check on your pizza.
- When the cheese is melted and there is a bit of char on the top, your pizza is done. CAREFULLY remove it from the oven with oven mitts and tip out the pizza onto a cutting board.
- Place the cast iron pan back on the stove top, turn the heat back on, and make your subsequent pies.
One Comment
Comments are closed.